This is an old revision of the document!
Table of Contents
MARC Downloads Setup
Baker & Taylor
Prerequisites for setting up MARC Profile
- You need to have access to this service; if you do not see Admin > MARC Profiles in your menu on TS360, contact your rep to get access.
- <fc #4682b4>If using branches in grids</fc> – You must have set up branch names already.
- <fc #4682b4>If using funds in grids</fc> – You must have set up fund names already.
Creating a MARC Profile
1. Sign in to TS360.
2. Go to Admin > MARC Profiles.
3. Click the grey Create new MARC Profile button.
4. Create a profile name and click the orange Save button to save your profile name. You will notice the green confirmation message at the top noting that your MARC profile has been created.
No Grids
If you are assigning branch names or fund codes in TS360, use the instructions for Gridded Profiles.
1. From within your new MARC Profile, click on the MARC Bibliographic Rules tab.
2. You'll notice that they already have one row created for you to fill in. Click in the drop down box and choose Add.

3. This opens up new fields for you to start entering information. When not using grids, the only two subfields you need are net price and quantity.
4. To enter for QUANTITY:
- Change Grid field to TS360 Data
- Change Branch to Order Quantity
- In the Tag field, enter “962” and in the Subfield enter “q” (lowercase)
5. To enter for NET PRICE:
- Click Add New Tag Rule to create a new row
- On the new line, click Select and choose Add. This populates some default info just like before.
- Change Grid Field to TS360 Data
- Change Branch to Net Price
- In the Tag field, enter “962” and in the Subfield enter “p” (lowercase)
6. Click the orange Save button to save your information.
Grids
Once you have created a name for your MARC profile, continue here. You will also need to have already populated your grid fields via Admin > Grid Codes.
If you are only downloading price and quantity, use the instructions for Non-Gridded Profiles.
1. Click the Primary Grid Tag Rules tab.
2. In the top portion of the page, enter 962 for the MARC Tag for Grid Distribution. Leave all the other fields blank/unchecked.

3. In the bottom half of the page, you will be mapping your grid fields to the subfields in Evergreen. Which ones you choose will depend on which fields you are currently using in your grids.
To enter for QUANTITY:
- Start on the first pre-populated row OR delete the row and click Add New Tag Rule to start fresh
- Change Select in the first field to Add
- Second column should be Grid Field
- Third column should be Grid Qty
- In the “to Subfield []” blank, enter “q” (lowercase)
To enter for NET PRICE:
- Click Add New Tag Rule to create a new row
- On the new line, click Select and choose Add. This populates some default info just like before.
- Change Grid Field to TS360 Data
- Change Branch to Net Price
- In the “to Subfield []” blank, enter “p” (lowercase)
To enter for BRANCHES:
- Click Add New Tag Rule to create a new row
- On the new line, click Select and choose Add. This populates some default info.
- The second column should say Grid Field.
- Change the third column to Branch.
- In the “to Subfield []” blank, enter “b” (lowercase)
To enter for FUNDS:
- Click Add New Tag Rule to create a new row
- On the new line, click Select and choose Add. This will populate some default info.
- The second column should say Grid Field.
- Change the third column to Fund.
- In the “to Subfield []” blank, enter “f” (lowercase)

Click the orange Save button to save your work.
Ingram
You must log in to iPage with your organization's admin account to make these changes.
1. Log in to iPage.
2. From the My Account menu, choose Administrator Settings > iPage Account Settings.

3. Selected Acquisitions Vendor should be “Other.”

4. Click Marc Setup
5. This opens the “Add Data Mapping” area. On the first line, it should be set up as:
- Tag #: 962
- Subfield: p
- Data Element: Discount Price

6. Click Add to add a second line for quantity. This line should be:
- Tag #: 962
- Subfield: q
- Data Element: Copies (Total Quantity)
7. Click Add to save your second row.
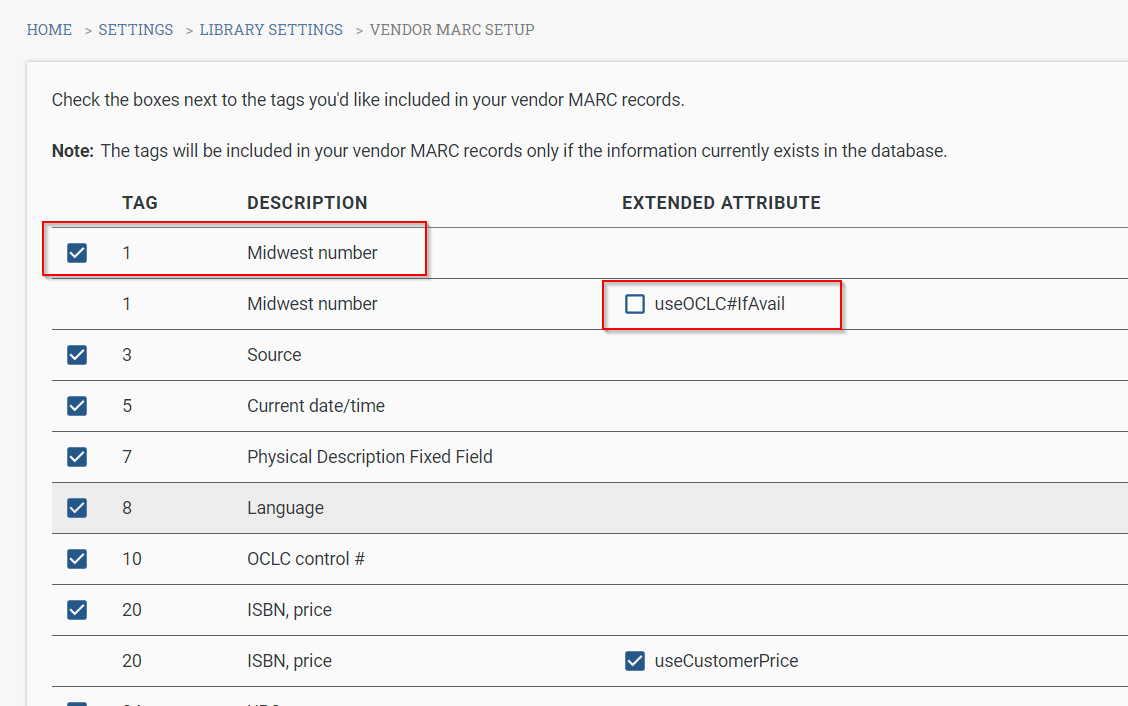
Midwest
Midwest sets up the majority of your MARC download settings when doing your EDI account setup. However, there is one setting you need to confirm is unset.
1. Log in to Midwest's site at https://www.midwesttape.com.
2. Navigate to Settings > Change Library Settings > Manage Vendor MARC Config.
3.