This is an old revision of the document!
Table of Contents
Merging Title Records in Evergreen
An essential function in database clean-up and maintenance is merging duplicate records. Duplicate records are two or more bibliographic records that represent the same bibliographic entity, with the same publication information and physical description. Follow PINES policies and procedures to identify duplicate records. You can enter records to be merged in Record Buckets either using the Other actions menu within bibliographic records, baskets in search results and the OPAC view of a record, or using the Record Query function embedded within Record Buckets. Baskets and the record query allow you to add more than one record to a bucket at one time.
Keep in mind that merging records is actually merging the holdings from multiple records to the lead record and deleting the other bibliographic records from the database.
Entering individual records in a Record Bucket
While viewing an individual title record in any view, from the Other Actions menu, you can add the record to a Record Bucket.
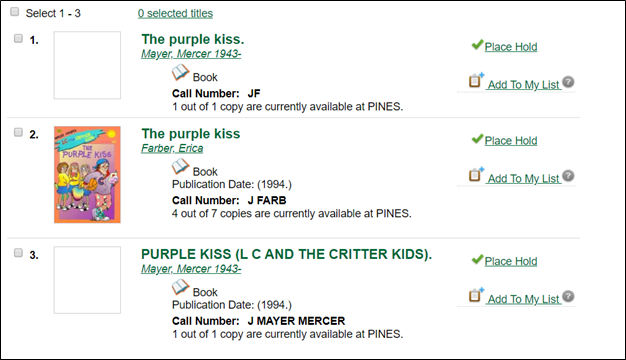
In this list of titles, there appears to be three duplicate records:
Check each suspected record in MARC View to determine if they should be merged. If there is not enough information in the record, you may need to check the item itself. You can also place the bibliographic records in a Record Bucket for a side-to-side comparison for final verification of their suitability for merging.
Place each record in a Record Bucket while viewing it by choosing Add to Bucket: from the Other Actions menu:
A dialog box will open for you to choose the bucket you use for merging or Add to New Bucket. If you add to new, you will need to name the new bucket.
Put each record to be merged in the same bucket.
Using Record Query to build a record bucket
You can also use the Record Query functionality within the record bucket interface to create a list of records to add to a bucket. Record Query allows you to add more than one bibliographic record at a time to a bucket. You can also add to multiple buckets using the pending record function.
Open Record buckets and click on the Record Query tab:
You can choose a bucket for your titles directly from Record Query or from the Bucket View tab:
You can do a keyword search without a search key. Other indexes require a search key:
| Search key | Definition |
| keyword/kw: | search keyword(s) |
| author/au/name: | search author(s) |
| title/ti: | search title |
| subject/su: | search subject |
| series/se: | search series |
| site: | search at specified org unit, using the library short name (STATELIB or STATELIB-L) |
(keyword, title, author, subject, and series support additional search subclasses, specified with a |. For example: title|proper: gone with the wind)
You can also combine search keys. For example: au: Weber ti: by schism rent asunder. You can use Boolean operators such as * as well as && for AND, || for OR.
Examples:
- autis*
- subject:christmas (netherlands || dutch || holland)
- ((learning || reading) && (difference* || difficult*) ) || dyslexia
Once you have a list of potential duplicates, choose the records from the list to add to your bucket using the Actions menu.
Click on Bucket view to view completed bucket.
Using baskets to build a record bucket
You can add records to a bucket from search results or from an individual record’s OPAC view using a basket. Baskets are temporary holders for a specific action and will empty on logout.
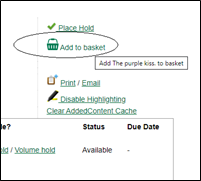
Select the records to be added to a bucket,
From the search results:
From the OPAC display of a record:
You can add records to a basket from different search results.
Once you have all desired record in a basket, you can transfer them to a bucket.
A dialog box will open for you to choose a bucket. You will need to clear the basket to reuse it for a different search in the same session.
Merging bibliographic records
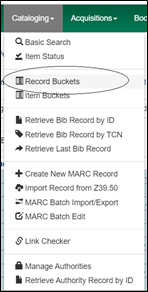
Open a record bucket loaded with records to be merged. You can open the Record Buckets interface from the cataloging menu:
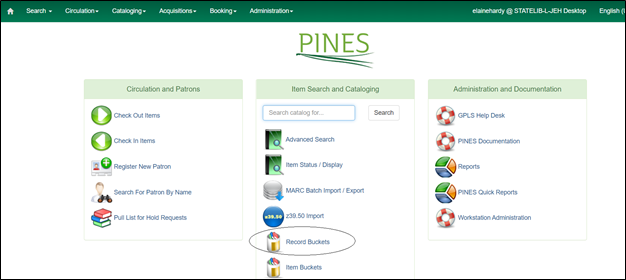
Or the home page:
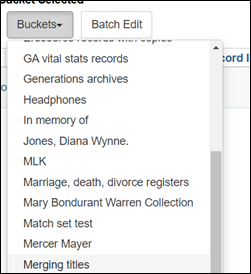
From the drop-down menu Buckets, pick the bucket you are using for merging.
A list of records in that bucket will be displayed. Click the box beside each record you want to merge, then access the Actions menu and choose Merge Selected Records. Only those records selected from the list will be included in the merge record interface.
The merge records interface will open:
The records are displayed with their record summaries. You can use the summary to easily determine record with an OCLC based TCN to be used as your target record.
Some of our bad records are large print on regular print records, or sound recordings or visual materials on book format. Some of these records do not indicate in the body of the bibliographic record that they are not regular print or book format. If needed, check the volume and copy attributes to see if the call number or local shelving location gives you a clue this is a possibility. When in doubt, check the item itself (request the item or refer it to the cataloging coordinator at the owning library if it is not in your library). Use the Toggle Holdings Button to check the call number and other holding information if needed.
You can Remove from Consideration any record that you do not want to include in the merger. The record remains in the Record Bucket but is no longer a candidate for the specific merge.
Closing the Merge record interface at the X or clicking on the Cancel button, cancels the merge.
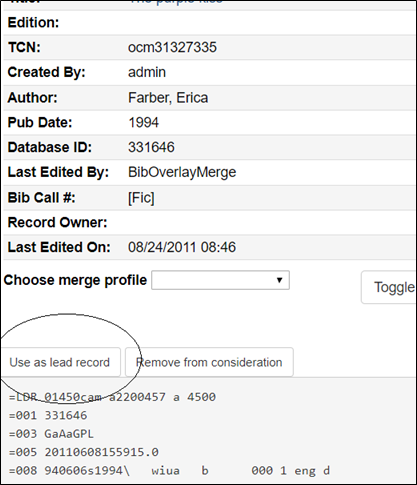
Choose your lead record (the record all the others are to be merged to) by clicking on Use as lead record button.
PINES does not use a merge profile, so ignore that option.
Once you select the lead record, you can edit it if needed. Editing the bibliographic record here is handy if you want to add a MARC field from a duplicate to the target record or make any other edits to the target record. Best practice, however, is to edit the record in OCLC’s Connexion Client and then overlay it after you merge the duplicates.
- Edit opens the MARC editor interface within the merge record interface. Click on Cancel if you decide not to make any edits.
- Edit using full editor opens the MARC editor in a popup box. You will need to Save and then click on the Done button to close the editor. If you decide not to make any edits, click on the Done button.
Some PINES records for multi-volume sets are on separate records rather than on the correct multivolume record. Some of those individual records for the same library do not indicate volume designation in the call number, thus having identical call numbers. If you merge these records without editing the call number, Evergreen will merge so that there is one volume record attached to the owning library with multiple copies. (Please note that it will keep different library’s holdings separate.) Before you merge the record, you should edit the call number by adding the volume designation.
You can also edit item information, if needed. Do not add a parts label at this point since the label is dependent on the lead record. Add or edit parts labels after the records are merged, even if the record to be merged has a parts designation.
To edit the holdings information, click on the Toggle Holdings Display button:
The holdings list for each record will display:
- Edit Volumes allows you to edit the call number
- Edit volumes and copies allows you to edit either the call number or item attributes.
Once you have edited the call number, click on the Save Changes button and then the Done button to close the editor:
Once you have confirmed the records are duplicates, made any necessary changes to the bibliographic records, copies, or call numbers, Removed From Consideration any that should not be merged, and chosen the lead record, you are ready to merge the records. Click on the Merge button just under the record summary.
Your records will be merged in the database and the lead record will open in a new tab. You can overlay the record at this point. It is best practice to overlay older records with their most current form from OCLC’s WorldCat. Overlaying can update subject headings, notes, and 33X and 34X fields.
Keep in mind that merging records is actually merging the holdings from multiple records to the lead record and deleting the other bibliographic records from the database.
Sometimes, some or all of the merged and thus deleted records may still display in a search result list until re-indexing occurs. A merged record will note that is deleted and will have no holdings attached.

