Table of Contents
Amazon Ordering
Amazon does not offer EDI ordering or MARC downloads. You have a couple of options for working with Amazon orders.
Ordering Options
1. Create no purchase order at all. You would create your cart on Amazon and order it. Then when the items arrive, create invoices for each charge.
Considerations:
- You will not have your funds encumbered if you go this route. Your funds will not be debited until you create, save and close your invoices.
- You will not have on order copies in the catalog. Copies will need to be created manually whenever they arrive.
- You will not have line items to mark received. So there will be a hole in your receiving history, since Amazon orders will not be included.
To do this workflow, follow these instructions: Invoices Only.
2. Create a purchase order, add brief line items, activate PO, and order cart on Amazon.
Considerations:
- You will have line items that you can mark received when they come in.
- Your funds will be encumbered at the time of ordering, so your fund balances will more accurately represent your available balances.
- You will not have on order copies in the catalog. Copies will need to be created manually when they arrive.
To do this workflow, follow these instructions: PO with Brief Records.
Invoices Only
PO with Brief Records
1. Go to Acquisitions→Create Purchase Order.
2. You'll get a pop-up box to set some information. Make sure to set your Ordering Agency and Provider. You can set the name of your PO here, if you'd like, but it's not required.
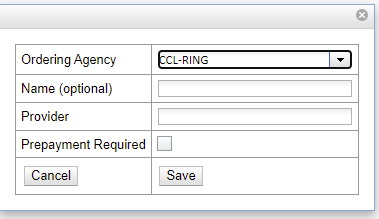
Once done with that, hit Save. This will open up your purchase order.
3. From the Actions menu, select Add Brief Record. This will open a new pop-up with some information to fill out.

The only two fields you need to fill out in this form are Title (required) and Author. Do not fill in Estimated Price yet.
Once you've entered that information, hit Save Record and your purchase order will reload.
4. You can now see that you have a bare-bones sort of line item available. You'll notice that you're missing an ISBN and it says “link to catalog”. These are both okay in this workflow. This is only highlighted here so that you don't feel you need to fix those things.
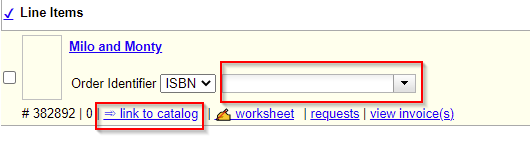
5. Add your discount price to your line item.
6. The line item is automatically created with 1 copy. If you need to adjust the quantity, you can click Copies (1) and add more copies. You can also add branch and fund information for this title at this time if you would like.
7. If you need to add more titles to the purchase order, repeat the steps of going to the Actions menu and choosing Brief Record. Repeat until all titles that you're ordering have been added to the purchase order and have prices.
8. Once you've added all titles, make sure that all copies have branch and fund information. If you didn't already add it through the Copies link, you can also use the batch updater if all information is the same for your line items.
9. Once all line items have prices, quantities, branch and fund information, you're ready to activate the order.
At the top of the purchase order, choose Activate Without Loading Items.
10. Your purchase order will reload, and you'll see that it's now on-order. Your funds are now encumbered. You can now submit the cart on Amazon's website.
When your items arrive
When your items arrive, you will mark them received using your normal receiving method.
When your items are invoiced
When you receive the invoice from Amazon and your items are received, you will need to create the invoice. The easiest way to do this would be to follow the instructions here: Create invoice with items on a PO.
Especially with Amazon, make sure that the price on the invoice is correct. Amazon often changes the price between the time that you order it and when they bill you; it's often off by a couple of cents. Make sure that your invoice reflects what they're billing you.
If there are any fees, like shipping or tax, you can create direct charges on your invoice to account for those.
PO with full MARC records
However, there is a workaround to get MARC downloads so you can populate your purchase orders for Amazon purchases.
Requirements
- You will need a program called MarcEdit, which can be downloaded from here.
- You will need Excel on your computer.
- (Optional) You will need to download the PINES-created MARCEdit template from here. If you do not download the template, you will need to define the MARC fields and subfields yourself.
Downloading Data
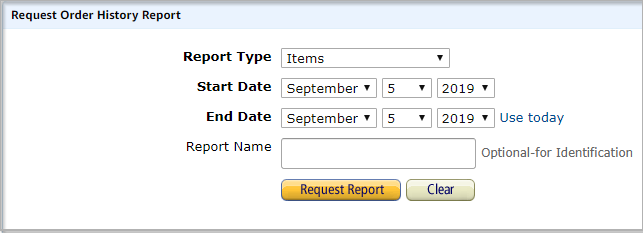
Amazon offers an option to download your order history via Order History Reports. You can access this area here.
Your search should be set to search for Items, with Start Date and End Date both as today's date. Name the report something explanatory (like 9.5.2019-Adult) and then click Request Report. This will download a CSV file with your order date.
Creating Minimal MARCs
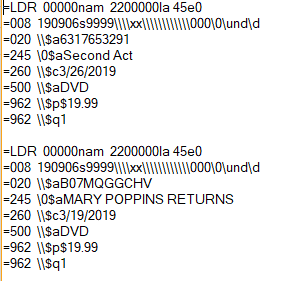
With this method, you do get very brief MARC records, particularly with DVD purchases since there's not much info to include other than the title. However, if you're just trying to populate your lineitems with price, quantity and title then this is the fastest method to do so.
As an example, your MARC records will end up looking something similar to this:
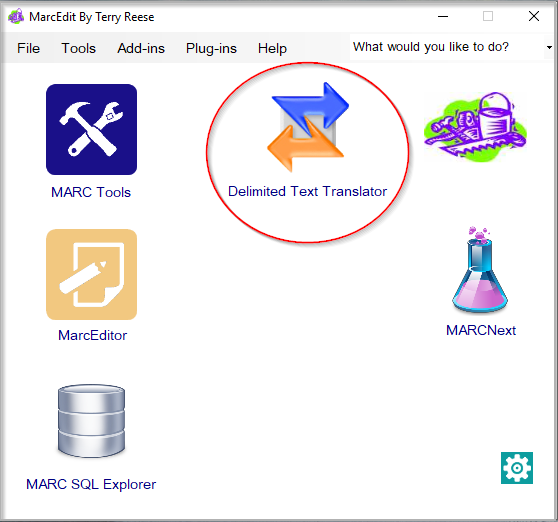
1. Open MARCEdit.
2. From the main screen, choose Delimited Text Translator.
3. From the next screen, click the yellow folder icon next to Source File and find your CSV file you downloaded from Amazon.
4. In the Output File box, click the yellow folder icon and create a name for your output file. It should be file format .mrk or .mrc.
5. In the Delimiter Values area, select the Delimiter drop-down box and choose “Comma”.

6. Click Next.
7. Toward the bottom of the page, ensure that “Ignore Header Row” is checked.

8. Click “Load Template”. Locate the template file that you downloaded from PINES. Its file format will end in .mrd. Once you have selected it, click Open.

9. You will be returned to the translator page, and you'll notice that there are now arguments listed in the “Arguments” box.

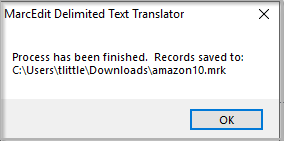
10. You may now click the Finish button. After a moment, you will receive the notification popup to tell you that your records have been processed, and where the file is located.
11. From here, upload your new MARC file via Load MARC Order Records and proceed with your purchase order as normal.
You may view a screen recording of the MarcEdit process below: