
Table of Contents
Add to PO/Selection List
Load MARC Order Records
Load MARC Order Records is the main method of loading bib records into the database and creating a selection list and/or a purchase order.
Load MARC Order Records can also colloquially be known as “LMOR” or “Vandelay.”
It is located via Acquisitions→Load MARC Order Records.
A video tutorial showing how to set up your fields as well as doing an upload can be found at Niche Academy: Load MARC Order Records.
Prerequisites:
- You must have already created at least one provider and it must be set to 'active.'
- You must have already created at least one fund.
- You must have already set up MARC downloads in your vendors' website(s).
- PINES staff must have already set up your 962 holdings tags in your provider profile(s).
- [If using grids] Grid info from vendor websites must exactly match branch and fund (if using) info in Evergreen
Required Fields:
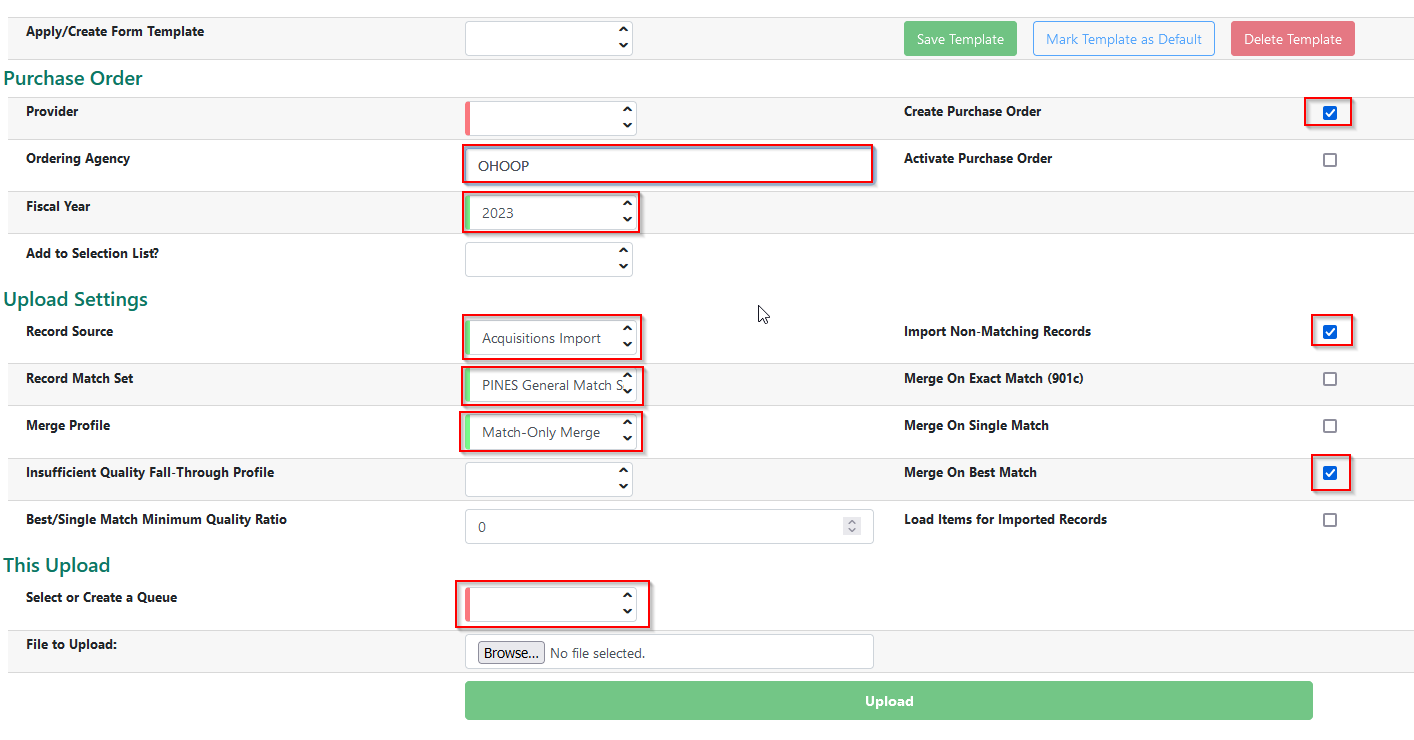
In general, the form will let you know which fields are required by a red bar at the beginning of the field. Some fields are prepopulated from PINES-wide settings. However, if your form is missing any of these settings, you will need to add them before doing an upload.
Setting up a template
Once you have applied all of your default settings to be used each time you do an upload, it is best practice to create a template that will automatically apply these settings each time you use the form.
To create a template:
1. Fill in all of the required fields in the form, including Ordering Agency.
2. In the field for Template name at the top of the form, enter a name like 'Default' or whatever makes sense to you.
3. Click out of the field so the form knows you entered something. (You'll see the Save Template button turn green to let you know you did it.)

4. Click the green Save Template button, followed by Mark Template as Default.
Now the next time you open Load MARC Order Records, all of your fields–except Provider and Queue Name–will be already populated for you.
Doing an Upload
To upload a MARC file that you have downloaded from your vendor, you can open Load MARC Order Records by going to Acquisitions→Load MARC Order Records.
2. Select the provider account you will be using for this order. You can click into the field for Provider and it will provide a dropdown list of your providers. If your list is long or you don't see what you're looking for, you can type in a letter or two to narrow down the list.
3. Create a new queue by typing into the field for Select or Create a Queue. This is a required field, as denoted by the red bar.
4. Click “Choose File”/“Browse” to open your computer's file explorer and locate your MARC file to be uploaded.
5. Click Upload.
Once you click Upload, you will see one progress bar that says “Upload File to Server” and then a large green “Processing…” text.

The progress bar for “Upload File to Server” will get to 100% very quickly.
This does not mean your upload is complete.
This means that your file was uploaded to the server and put in a temporary place for Evergreen to start matching your titles up to bib records in the catalog (the real work being done). Leave your upload window open until you confirm either by the confirmation at the bottom of the screen, or one of the other below methods, that your upload is complete.
If your upload is smaller (less than 10 titles or so), you will probably receive confirmation that your upload is complete. This will include a direct link to your completed purchase order and queue. This info will appear below the progress bar.
Checking if Upload is Complete
There is an ongoing bug affecting Evergreen where doing larger (10+ titles) uploads, the LMOR screen does not update when the upload is complete. The upload progress bar remains running indefinitely, even though your queue does finish processing in the background.
As a workaround, you are able to check if your queue is complete in two ways:
Option #1: Search for your upload queue
Open a new tab in Evergreen. Leave your tab open that has your upload running.
From this new tab, select Cataloging→MARC Batch Import/Export.
From the tabs across the top of the page, choose Inspect Queue.
You will see a list of your queues, along with a Yes/No in the Complete column to know if your queue is done. If you see your queue that you just started, it will most likely still have a “No” in the Complete column. If this is the case, you can double-click on the row to get a detail page about your queue.
Primarily you'll be interested in two numbers in the Queue Summary: Records in Queue and Records Imported.
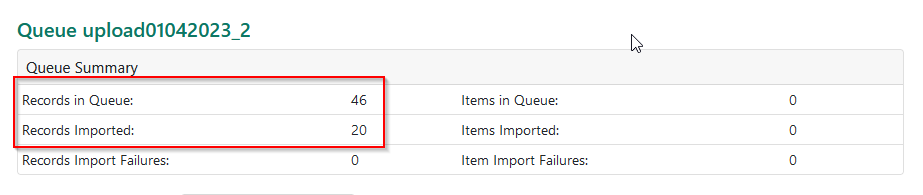 Records in Queue is the total number of titles that your upload contains. Records Imported is the number of titles that have been processed. When the two numbers are the same, your upload is complete.
Because this page is scoped to your specific queue, you can refresh this page as much as you like. This way you can open the page for your queue, then occasionally refresh the page to see if your upload is complete.
Once your queue is complete, you may close the tab with your upload.
Option #2: Search for your purchase order
Your purchase order is created as soon as you start your upload. However, it's not done processing until all of your line items say “Catalog” instead of “Link to catalog.”


1. Search for your purchase order and open it.
2. You can see if any of your line items still say “Link to catalog” easily by doing Ctrl+F on your keyboard, and typing “link.” If the word appears anywhere on the page, it will find it and you can see if your PO is still processing.
3. Once all of your line items say “Catalog” you are okay to activate the order or modify any of the line items as needed.
Brief Records
“Brief records” are mainly used when you need to add a line item on a PO manually. Some possible examples would be if you were entering titles for an Amazon order–you wouldn't have a file to upload that would have prepopulated your PO for you, so you might be manually entering info about the titles you're going to order.
To create a brief record:
1. Within a PO, go to the Actions menu and choose Add Brief Record.
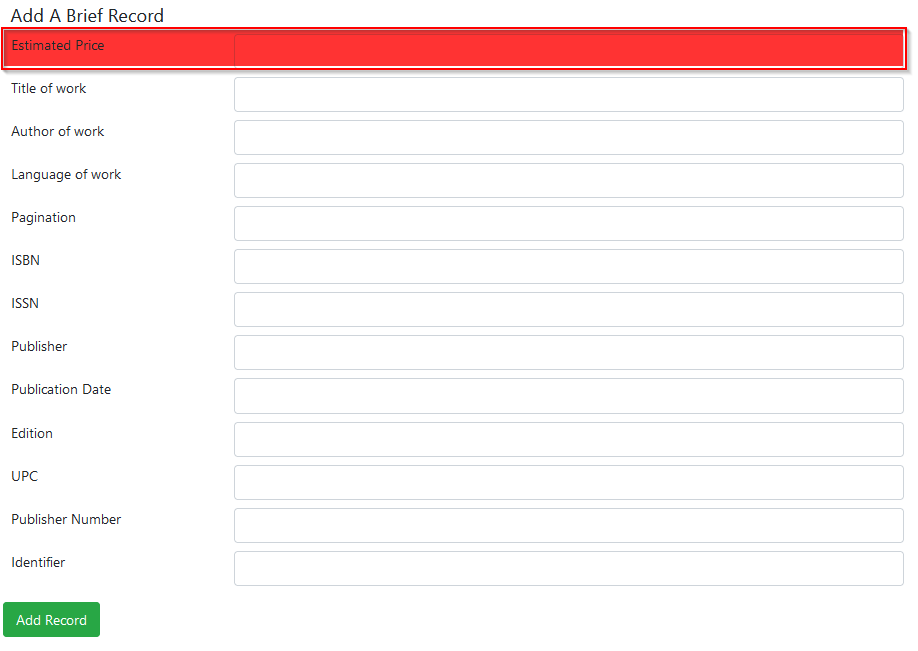
The first field in the form is for Estimated Price. Do not use this field. There is a PINES customization that blocks this from writing the value to the line item, so anything you enter there won't be saved. You'll have to enter the price into the line item once it's created.
Otherwise, you can enter as much information as you like into this form to populate the line item.
View/Place Orders
View/Place orders is an option when browsing the catalog to create a line item from a record that already exists in the catalog. One use case might be if you were weeding damaged items and wanted to reorder, you could add those items to a PO while removing them from the catalog.
1. Pull up a particular bib record in the catalog.
2. From the Other Actions menu button on the far right, choose View/Place Orders.

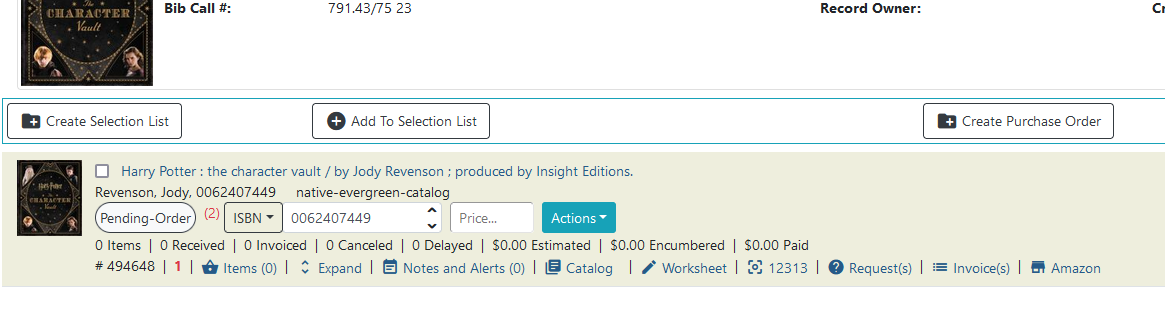
3. From here you have several options. You can:
- Create a Selection List
- Add to an existing selection list
- Create a purchase order
- Add to an existing purchase order
If you have already made any orders that are associated with this bib record, you will also see them listed on the page.
To Create Purchase Order, once you click the button you will see the normal screen for when you're manually creating a new purchase order.
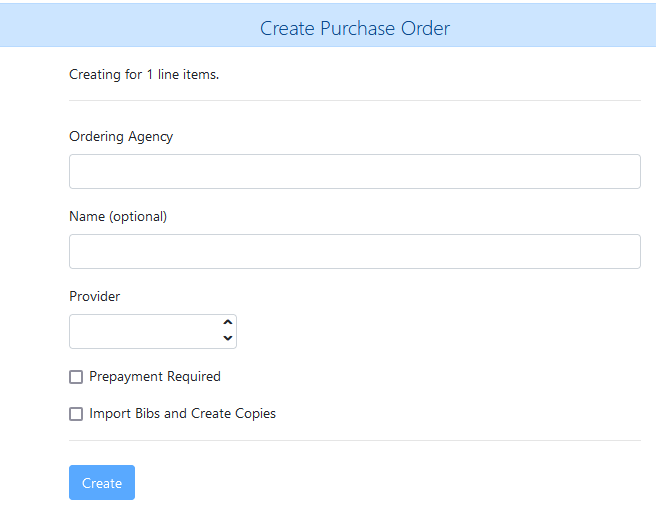
You will need to enter your Ordering Agency and Provider. You can also enter a Name if you like, but it's not required. Once done, click Create. You'll then be redirected to your new purchase order, and will see the line item that you just added.
To Add to Purchase Order, once you've clicked the button a field to the right of the button will appear.

You will need to enter the name of an existing pending PO to add this line item. Once you've found the PO, click Apply and you will be redirected to your PO.
Load Catalog Record IDs
Load Catalog Record IDs are for specialized circumstances, and are similar to View/Place Orders only done in batch. You will need a list of bib record IDs (not TCNs), which means you will probably have to have run some sort of report prior to using this function.
Additionally, although you can have other information in the CSV file, like title, author, etc. the first column must be the bib record ID.
If you already have a CSV file that meets these criteria, you can go to Acquisitions→Load Catalog Record IDs.
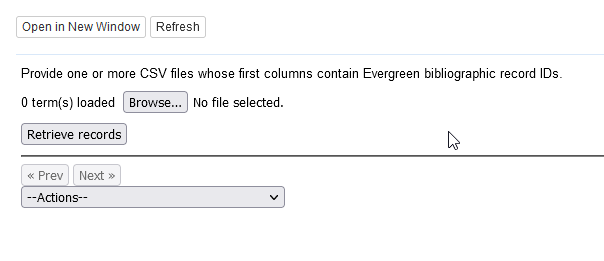
Use the Browse/Select File button to locate your CSV file, then click “Retrieve Records.”
A list of line items built from those records (similar to how they appeared in View/Place Orders) will appear. From the Actions menu, you can Create a Purchase Order to add these line items to a new purchase order, or Add to Purchase Order to add to an existing Pending purchase order. You will need to know the name of the PO to add to an existing one.
