
Table of Contents
Additional Admin Settings
How to set up a copy location
No on-order holds
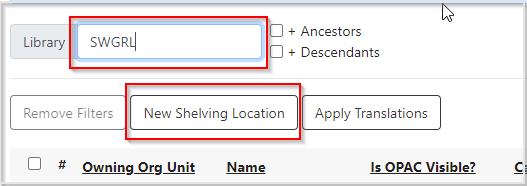
1. Go to Administration→Local Administration→Shelving Locations Editor.
2. Change the Library selector to your library system.
3. Click New Shelving Location.
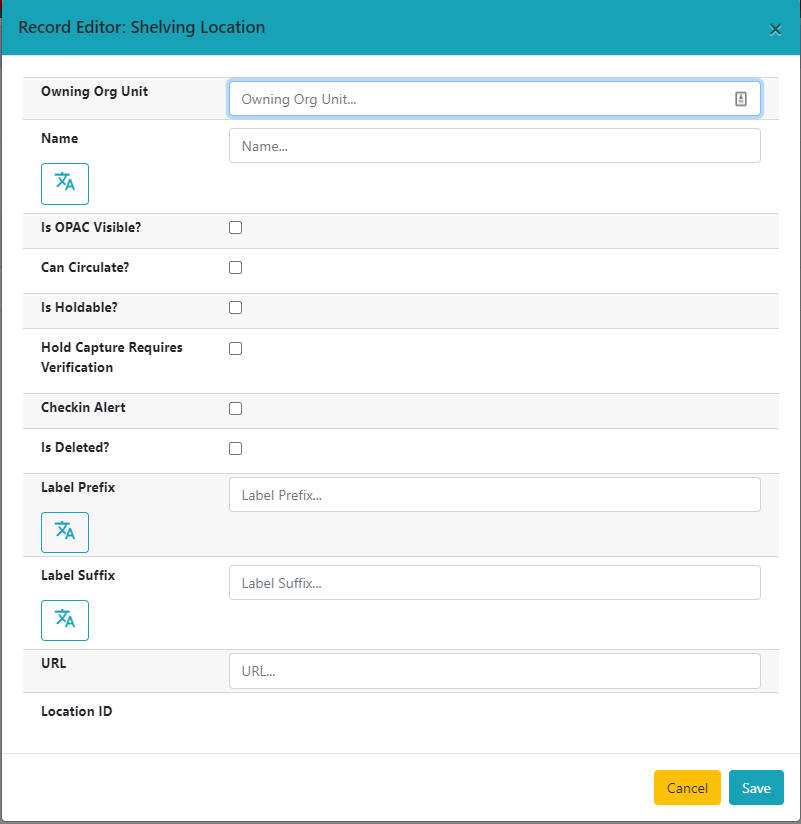
- Owning Org Unit - Your system
- Name - Should be exactly “ON ORDER”, not On Order or ON-ORDER or any other variation.
- Is OPAC Visible? - Unchecked
- Can Circulate? - Unchecked
- Is Holdable? - Unchecked
- Hold Capture Requires Verification - Unchecked
- Checkin Alert - Unchecked
- Is Deleted? - Unchecked
- Label Prefix - Do not use
- Label Suffix - Do not use
- URL - Do not use
4. Click Save.
5. Confirm that your new shelving location appears in the list.
Using on-order holds
1. Go to Administration→Local Administration→Shelving Locations Editor.
2. Change the Library selector to your library system.
3. Click New Shelving Location.
- Owning Org Unit - Your system
- Name - Should be exactly “ON ORDER”, not On Order or ON-ORDER or any other variation.
- Is OPAC Visible? - Checked
- Can Circulate? - Unchecked
- Is Holdable? - Checked
- Hold Capture Requires Verification - Unchecked
- Checkin Alert - Unchecked
- Is Deleted? - Unchecked
- Label Prefix - Do not use
- Label Suffix - Do not use
- URL - Do not use
4. Click Save.
5. Confirm that your new shelving location appears in the list.
Distribution Formulas
Distribution formulas are intended for use in multi-branch systems to specify the number of copies that should be distributed to specific branches. The formulas are also used for all libraries as line item templates with the batch updater on purchase orders. Formulas can be created and reused as needed.
Create a new distribution formula
1. Select Administration→Acquisitions Administration→Distribution Formulas.
2. Click New Formula.

3. Fill in the fields in the pop-up.
- Formula name – The name you would like to use to identify this template
- Formula owner – The org unit whose staff can use this formula (e.g. STATELIB)
- Skip count – Leave blank

4. Click Save.
5. The screen will refresh and you will notice that you are now inside your new distribution formula and ready to add branches and quantities.

6. Click New Entry. Each entry is a line in the grid, usually assigned to a particular branch.

7. You can use any combination of fields to create your distribution formulas. You do not need to fill in every field. For example, if you do not want to include fund in your formulas–as in, you would like to manually assign them in selection lists or purchase orders–you can leave that field blank. The available fields are:
- Owning Library
- Copy Location
- Fund
- Circ Modifier
- Collection Code (only used if you get vendor cataloging)
- Item Count (quantity)
8. Click Apply Changes. The screen will reload. To view your list of distribution formulas, you will need to go back through Administration→Acquisitions Administration→Distribution Formulas.
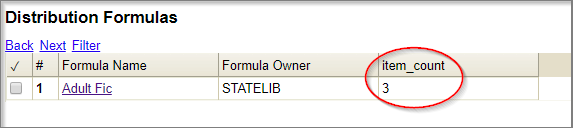
9. When viewing the list of your distribution formulas, the Item Count is the total count of quantities in that distribution formula.
Edit an existing formula
1. Select Administration→Acquisitions Administration→Distribution Formulas.
2. Click on the hyperlinked name of the formula you would like to edit.

3. At this screen, you can add a new entry, edit an existing entry using the drop down menus, or delete an existing entry using the red X beside the entry you wish to delete. If you click and grab the three dots on a particular row, you can reorder your list.

4. Click Apply Changes after you have made your changes.
Clone a distribution formula
1. Select Administration→Acquisitions Administration→Distribution Formulas.
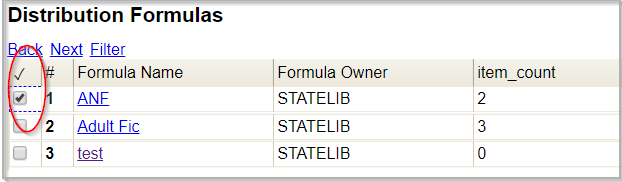
2. Check the box adjacent to the formula you wish to clone and click Clone Selected.

3. Make the necessary changes to your cloned formula and click Apply Changes.
Line Item Alerts
Line item alerts can be used on line items to provide a pop-up when items are received. These need to be created prior to being used for the first time.
1. Go to Administration→Acquisitions Administration→Line Item Alerts.
2. If you have any line item alerts already created, they will display in the list.
3. To create a new alert type, click New Line Item Alert Text.

4. This will pop up the alert creation screen. There are only three fields:
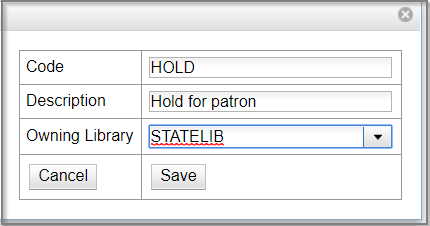
- Code – This is what you will see when you create an alert on your line items. It should be descriptive, but general. I.E. This will be what is used for this type of alert, but it won't have specific details. So, HOLD is good, but “Hold for Mary Smith” is not.
- Description – Optional
- Owning Library – This should be your library system
5. Hit Save to confirm/save your new line item alert, and you will be returned to your list of line item alerts and should now see your new alert type.
To see line item alerts in action, see Add an Alert in the Line Items: How To section.