
Table of Contents
Grids Setup
Grid codes (branches and funds) must EXACTLY match your codes in Evergreen, otherwise they will not be populated when you do your cart uploads into Acquisitions.
Notes:
- Branch names should follow your PINES branch codes, e.g. LOPL-SW or WGRL-BO
- Fund names in grids should follow your fund codes in Acq, not fund names
- There is a 26 character cap on fund codes in TS360, so name your funds accordingly
Baker & Taylor
Setting Up Branch Grid Codes
1. Log in to TS360 with the Admin login.
2. Choose Admin > Grid Codes.
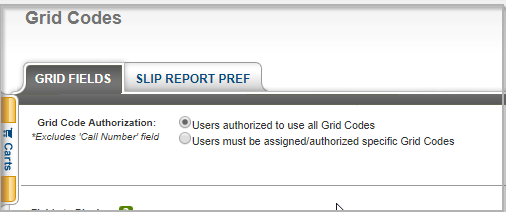
3. If you have multiple users creating carts, you will need to decide if all users should be able to assign all grid codes, or if each user will need to have only some grid codes available to them.
4. You will see several checkboxes called “Fields to Display.” Since we are creating branch grids right now, click the ticky next to “Agency Code.”

5. Now we will actually add our branch codes.

Display Agency Code Label As: Branch
There are 4 fields available: Code, Description, Effective Date, and Expiration Date. Expiration Date is not necessary except in special circumstances; it is recommended to leave it blank for each line.
6. On the first line, enter your first branch shortname (e.g. ARL-WAT) in the Code field.
7. In the Description field, enter your branch shortname again.
8. Effective date should be the day that you are creating your codes, so they are immediately available for use.
9. Click the gray plus sign on the right of your line to add your grid code.
10. Continue adding your branch codes.
11. When all are completed, click the orange Save button.
Setting Up Fund Grid Codes
Baker & Taylor offers a batch import option to import your funds en masse. This is useful if you have many fund codes. Instructions are below in Batch Add Fund Codes.
To add codes individually, follow the instructions here. This is appropriate if you only have a few fund codes or are testing.
1. Open TS360.
2. Navigate to Admin > Grid Codes.
3. If you are not currently using any fund codes, click one of the “Fields to Display” that is not currently in use.

4. Enter “Fund” in the Display GridField Label As field.
5. On the first line, enter your fund code EXACTLY as it is in Evergreen. Do not include the fund year. So it might look like ADULT-TIFT-BOOK, but WOULD NOT look like ADULT-TIFT-BOOK (2019). If they do not match Evergreen, they will not be populated when you do your Acquisitions uploads.
6. Click the gray plus sign to the right of your line to add your grid code.
7. Continue adding grid codes.
8. When all are completed, click the orange Save button.
Batch Add Fund Codes
1. Run the report “List of funds with parameters” found in Reports > Shared Templates > PINESacqadmin > Year End Reports.
2. Delete all columns in the report results spreadsheet except for the column for Fund Code.
3. Open TS360.
4. Go to Admin > Grid Codes.
5. If you are not currently using any fund codes, click one of the “Fields to Display” that is not currently in use.
6. Enter “Fund” in the Display GridField Label As field.
7. Click the gray Import Codes from File button.

8. This will provide you a list of the way that your upload file is formatted. Since your Notepad file has only the fund codes, you will use the Code Only option. So in your list of resulting grids, only the code field will be populated.

9. Make sure that “Header Row Included” is checked, unless you removed the header row in your spreadsheet.
10. Click the gray Choose File button and navigate to where your text file of grid codes is.
11. Click the orange Import button. This will import and populate your fund grid codes, and return you to the list of your fund grid codes.
12. Click the orange Save button at the bottom to save your work.
Ingram
Adding Grid Codes
You must log in to iPage with your organization's admin account to make these changes.
1. Log in to iPage.
2. From the My Account menu, choose Administrator Settings > iPage Account Settings.

3. Selected Acquisitions Vendor should be “Other.”

4. Click Marc Setup
5. This opens the “Add Data Mapping” area. On the first line, it should be set up as:
- Tag #: 962
- Subfield: b
- Data Element: Branch
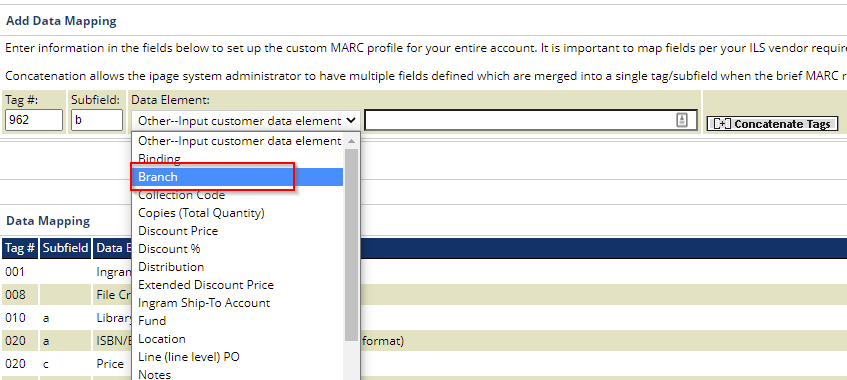
6. Click Add on the far right to save this.
7. To enter information for funds (if using), change the data to:
- Tag #: 962
- Subfield: f
- Data Element: Fund

8. Click Add.
9. Once you've added one or both of these fields, scroll down to the list of data mappings. Find your first field, e.g. “branch”. Click the button for Add/Edit Values.

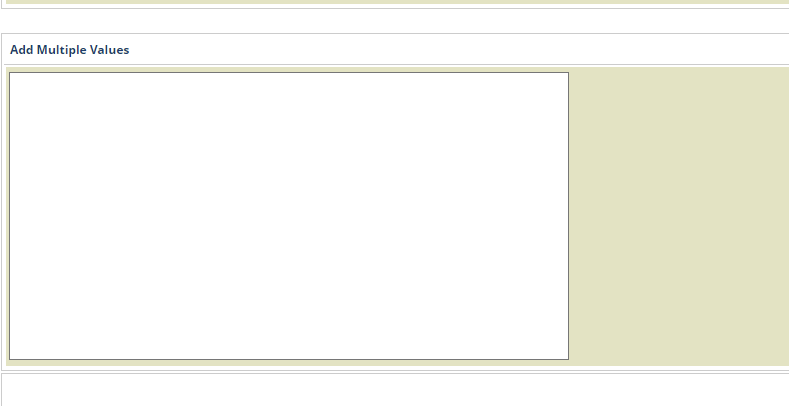
10. A little bit down the page will be a large box where you can copy and paste all of your branch/fund codes from Evergreen.
If you are adding fund codes, I highly recommend to run this report before doing this step: Shared Templates>PINESacqadmin>Funds>List of funds with parameters.
Open the report in Excel, and then you can select and copy the column for Fund Codes and paste it directly into this box in iPage. Make sure not to leave a hanging comma or space at the end of your last fund code!
11. Once you've entered your branch/fund codes, click Complete on the far bottom right.
Adding Grid Options to Templates
You've now entered all of your branch/fund codes, but you now need to enable them in your grid templates. To do this, go to Orders > Grid Ordering Setup.

If you have existing templates If you have and use existing templates, you will need to enable your new grid codes (like fund).
1. For the template you need to edit, click the Edit button on the far right for that template.
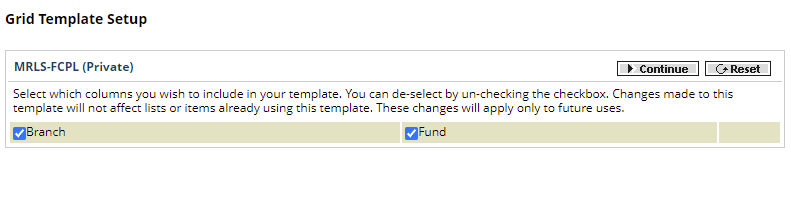
2. A pop-up will appear. If you already had branch as an option and have just added fund, you'll see that Branch is checked and Fund is not. Make sure both are checked, and then click Continue.
3. In the middle of the page you'll see the branches that you've previously set up for this grid template.

4. Select the fund codes that you'd like to add for each branch for this template.
5. When you're done with your changes, click Save and then Complete.
Midwest
Branch and fund codes are set up by Midwest staff, and will be created by Midwest when you're doing your setup.