
Table of Contents
Providers
Each provider profile represents a vendor account. Each vendor account used in the acquisitions process needs a provider profile. This profile contains information pertaining to contacting the provider, claiming, EDI, and holdings subfields. Providers can be edited should information change.
An ongoing list of vendors who offer MARC downloads and/or EDI ordering is here.
Searching providers
The Providers interface is accessed through Administration→Acquisitions Administration→Providers.
Once there, the providers search page will load.
There are several different search terms you can use if you're searching for a particular provider. However, if you just want to see a list of all your providers, the main search term to notice is the Owner.

This will default to your workstation library every time you open the page. In my screenshot, it's defaulted to LOPL-BULL because that's my workstation I'm logged into. However, there aren't any providers owned by LOPL-BULL, they're owned (in this case) by LOPL. So if I change the owner to LOPL and hit the blue Search button, it will now show me a list of all of my active providers.
Like many other places throughout the staff client, the results are in a grid which can be manipulated to your preference.
By clicking the gear icon at the top right of the grid, you can change which columns default to be visible. If you click “Manage Columns”, you can uncheck any columns that you don't normally want to see, as well as arrange them in whatever order you like.
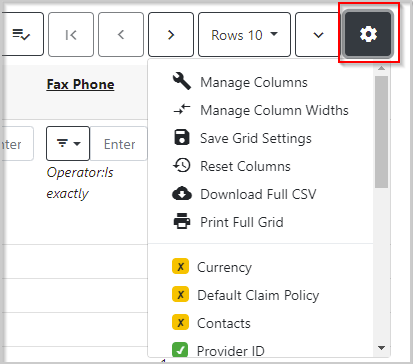
I also recommend increasing the number of visible rows, which can be done by clicking the “Rows 10” button to the left of the gear and increasing the number of visible rows.
Once you're happy with how your grid is set up, make sure to click the gear icon and choose “Save Grid Settings.” Your grid configuration will now be the same each time that you open the Providers page, and will follow your login even if you move to another device.
Provider Details Pages
Once you've created or retrieved a provider, the provider's details pages will open.
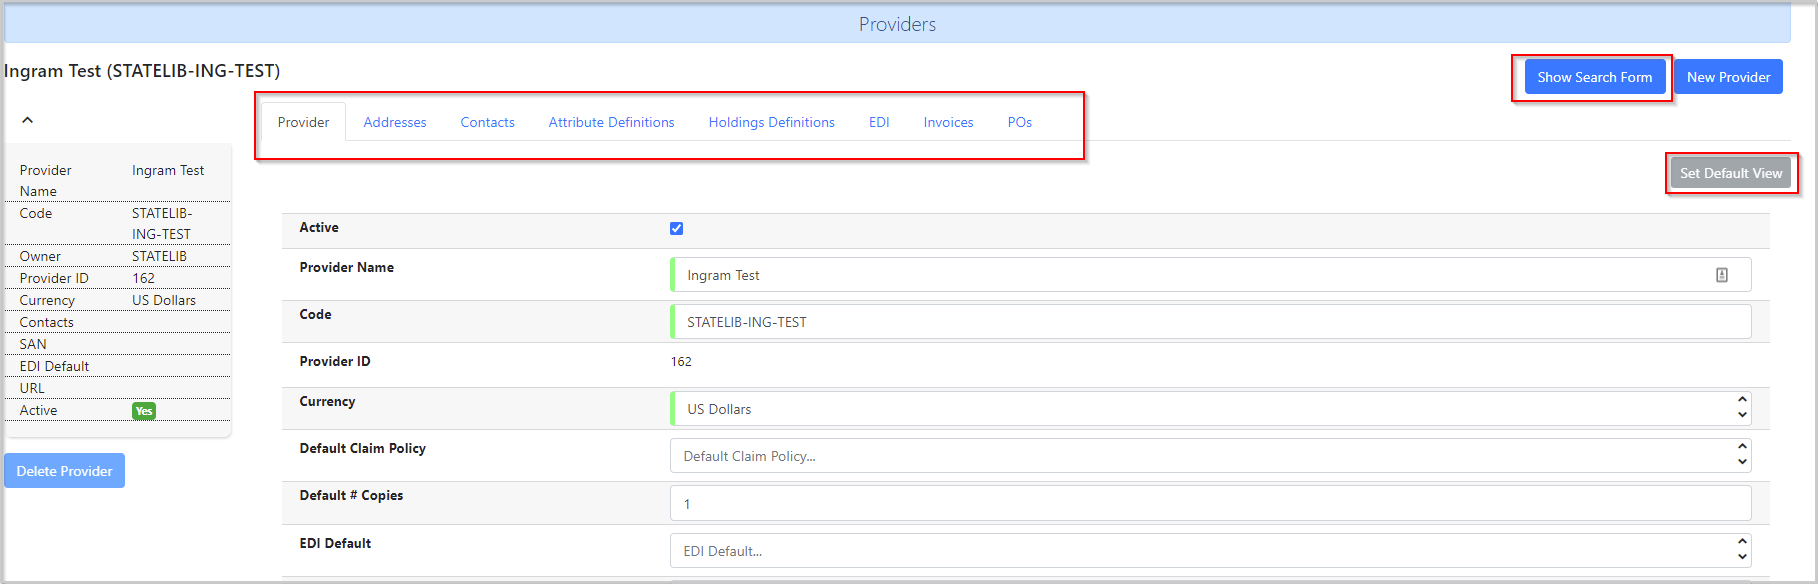
The main page shows the basic information about the provider–what was entered when the provider was created.
Tabs
You'll also notice that there are several tabs toward the top: Provider–Addresses–Contacts–Attribute Definitions–Holdings Definitions–EDI–Invoices–POs. Each of these tabs will take you to different information about this provider.
Set Default View
To the right there is a gray button called “Set Default View.” If you click this while within one of the sub-tabs like Addresses, Contacts, etc., it will set that tab as your “default.” This means that anytime you open any provider, it will automatically open to that sub-tab.
So if you wanted to set the POs tab as your default, anytime you opened a provider it would automatically open to the POs tab instead of the main info tab for the particular provider.
Show Search Form
While in a provider profile, you will always be able to access the blue “Show Search Form button.” If you click this button, it will reopen your search results grid above the provider profile.
So if you clicked on the wrong provider, for example, or just wanted to go to the next on the list, without needing to re-run your search, you could click “Show Search Form” and your previous search results would appear.
Create a provider
Providers must be created in the Acquisitions module before users can create purchase orders for providers.
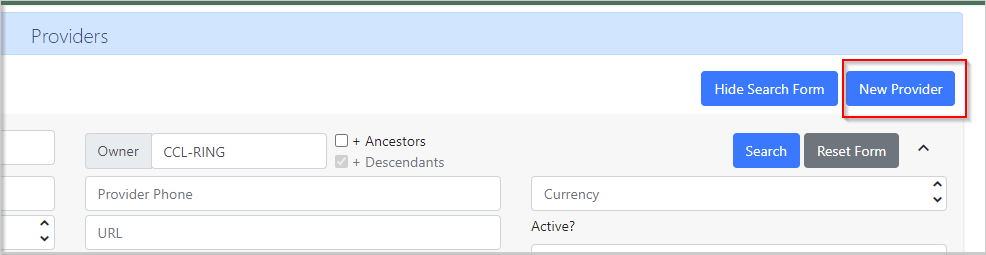
1. Select Administration→Acquisitions Administration→Providers.
2. Click New Provider.
3. Fill in the fields.
- Active (required) - This is checked by default, and should remain checked. Unchecking this box deactivates the provider. Providers must be active in order for purchase orders to be created from that provider.
- Provider name (required)
- Code (required) - Create a unique code for the provider. No character limit.
- Currency (required) - The currency the provider is paid in.
- Default claim policy - Leave blank.
- Default # Copies - Optional. Enter the default number of copies, if desired. When line items are added to purchase orders for this provider, if you fill in a number here that number of copies will automatically be created.
- EDI Default - Leave blank, it will be entered by PINES staff
- Owner - This will default to your workstation library. Make sure to change this to your normal ordering agency.
- URL - Optional. The Web address for the provider's website
- SAN - Leave this blank, it will be entered by PINES staff
- Prepayment required - Check the box if the provider requires payment before goods are received. Otherwise leave unchecked.
4. Click Save.
5. When you click Save, the page will go ahead and load you into the details pages for your new provider.
The other tabs (Addresses, Contacts and Attribute Definitions) are optional. The EDI tab is for PINES staff use only.
Edit or Open Provider
To access information about an existing provider, you can open its details page two different ways.
1. Once you have your list of providers, you can right-click on the row of the provider that you want to retrieve. Then from the menu that appears, choose “Retrieve Provider.”
2. You can also double-click on the row of the provider and it will open its details page.
Addresses
A provider's address appears on printed purchase orders and invoices for that provider. Adding an address for a provider is optional.
To add a new address:
After retrieving the provider
1. Click on the Addresses sub-tab.
2. Click the “New Provider Address” white button.
3. This will open the address editor. Required fields are highlighted in red.
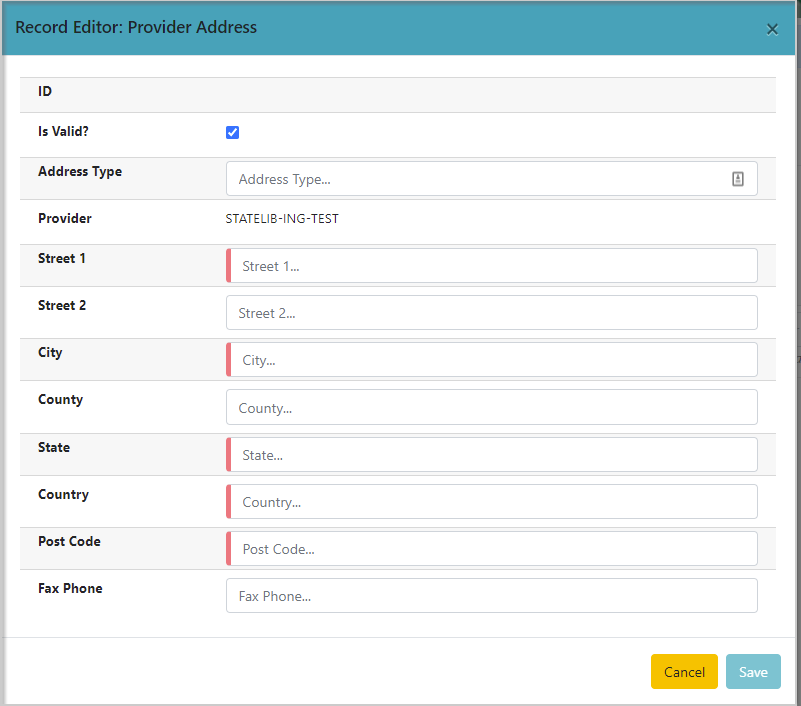
4. Click Save.
5. If you ever need to edit or delete an address, you can right-click on the address and choose either Edit Selected or Delete Selected.
Contacts
Contact information can be added to a provider profile. For example, if you wanted to add contact information for your sales rep, it could be added here in Acquisitions. Adding contact information is optional.
To add a contact:
After accessing provider profile
1. Click the Contacts tab.
2. Click the white “New Provider Contact” button.
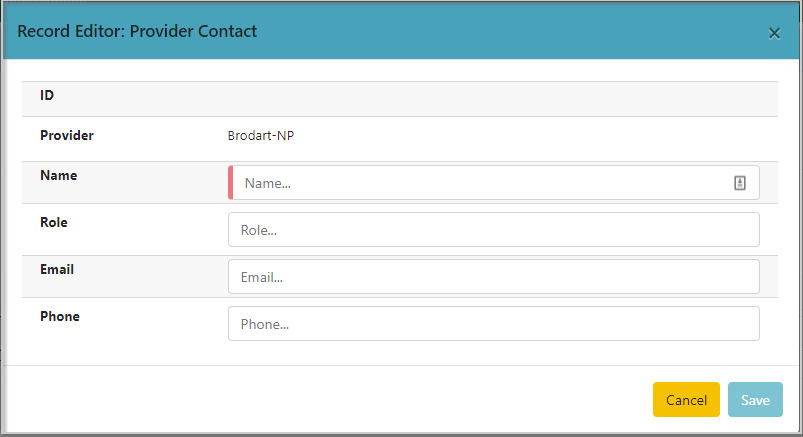
The only required field here is a name. All other fields are optional.
3. Once you've entered the information, click Save.
4. Your grid of contacts will refresh, and you'll now see your new contact in the list.
5. If you have multiple contacts for a provider, you can choose to make a particular one the “Primary Contact.” This does not have an effect elsewhere in Acquisitions, this would purely be for your own information.
6. To set a particular contact as the primary, right-click on the contact and choose “Set as Primary Contact.”
Contact Addresses
If you would like, you can also add an address to a contact.
To add a Contact Address:
After accessing the provider profile
1. Click on the Contacts sub-tab.
2. Left-click once on the contact that you would like to add an address for.
3. You'll notice that a sub-grid appears below your contact.
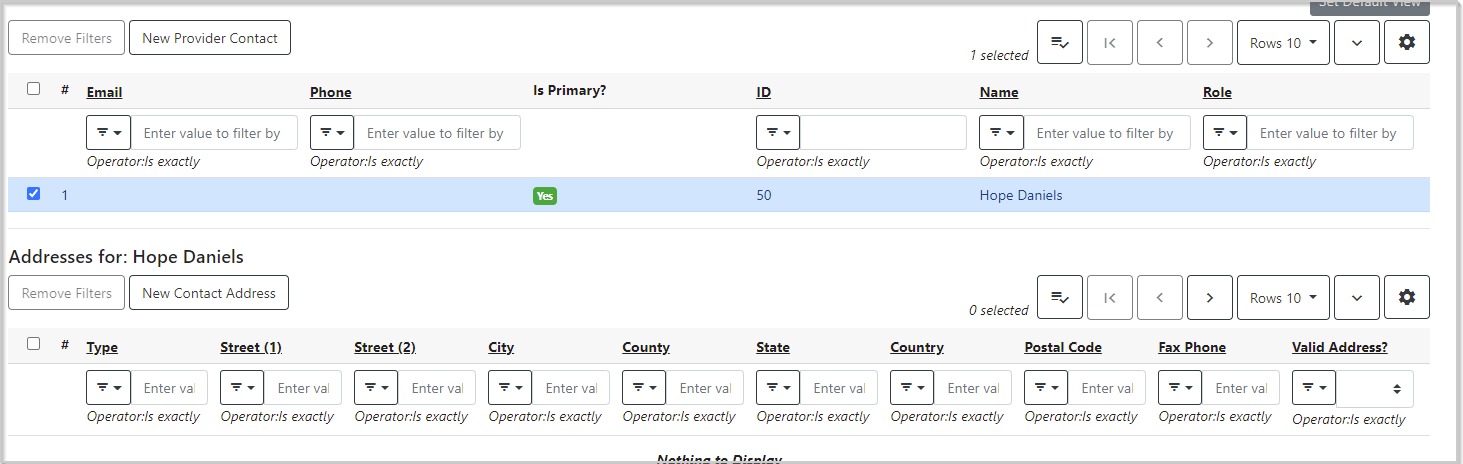
4. You can now click on the white “New Contact Address” to add an address for your contact.
Attribute definitions
Not currently in use by PINES libraries.
Holding definitions
Holding definitions, also commonly called holdings subfields, are used with a 962 Holdings Tag to allow you to import price, quantity and grids information from your downloaded vendor carts. Each time you create a new provider, you must set up the holdings subfields otherwise your information will not be imported when you upload your carts.
After accessing the provider
1. Click on the Holdings Definitions tab.
2. Enter “962” in the Holdings Tag field and click the blue Save button next to it.

3. Click the white “New Holdings Subfield” button. This will open the screen to create a holdings subfield.
This is where you're going to specify which subfields Evergreen uses to look for the price / quantity / branch / etc. when you upload your carts. You must follow the letters below, or your carts will not import the info correctly.
| Name | Subfield | Required? |
|---|---|---|
| Quantity | q | Required |
| Price | p | Required |
| Branch | b | Required if using grids |
| Fund | f | If using fund in grids |
5. Choose the attribute you're starting with (like Quantity) and choose it from the list. Then enter the appropriate letter in the Subfield field, and hit Save.
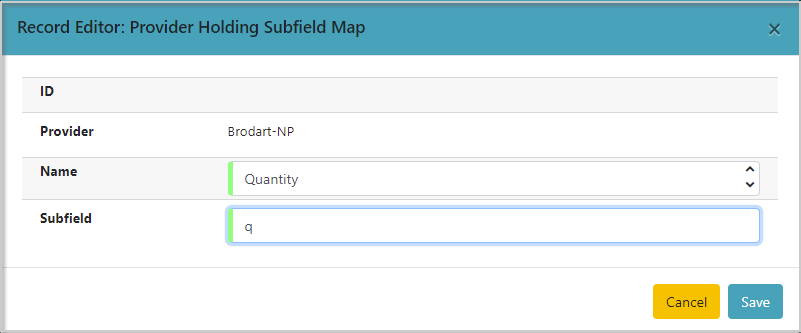
The page will refresh, and you'll see a list of holdings subfields.
6. Repeat the process until you've finished adding all of your holdings subfields.
EDI
This tab is used only by PINES staff. Do not edit.
Invoices
The Invoices tab is similar to the normal Invoices Search that's accessed through Acquisitions→Invoices. The only difference is that this grid listing of invoices is already pre-scoped to only show invoices for the specific provider that you're viewing.
This can be beneficial for smaller providers, but it does somewhat lack the flexibility of searching. There are sortable grid filters that can be used to narrow down results, however, if you prefer that method.
The list of invoices is sorted from Oldest→Newest, so if you have one of your main providers that you've been using for a long time, you'll definitely want to use the filters when using this sub-tab.
Of note, you'll notice that since this is a grid, the same configuration options are available as they were in other Evergreen grids (including the main provider results grid). This includes increasing the number of rows to view, as well as visible columns and column order.
If you want to view one of the invoices in the list, you can click the blue hyperlinked Vendor Invoice ID on a particular invoice. This will open the invoice in a new tab/window.

POs
The Purchase Orders (POs) tab is similar to the Invoices tab. It is a list of purchase orders associated with a particular provider.
Like the Invoices grid, it is sorted in Oldest→Newest order by default. Although you can sort the grid, your sort options are not saved and so you'll need to sort each time you open the sub-tab if you want to see them in a different order.
If you want to view one of the POs in the list, you can click on the blue hyperlinked PO Name on a particular purchase order. This will open the PO in a new tab/window.
Delete a provider
If you would like to delete a provider, the provider must not be associated with any other information first.
To be eligible to be deleted, a provider must not have any:
- Purchase orders
- Invoices
- Addresses
- Contacts
- Contact addresses
- Attribute definitions
- Holdings subfields
If the provider has any associated purchase orders or invoices, it will not be able to be deleted. Instead, you can go to the “Provider” tab in the provider details and uncheck the “Active” box. This will set the provider as inactive, and remove it from being selected for new purchase orders or showing in the default list of providers.
If the provider does not have any associated purchase orders or invoices, and you have already removed the other qualifying information, it can be deleted.
To delete a provider:
After accessing the provider
1. On the left side of the screen, beneath the provider summary, there is a blue “Delete Provider” button.
2. Click the “Delete Provider” button.
3. You will get a confirmation message, and once you confirm to delete, the page will refresh with your list of active providers.