
This is an old revision of the document!
Table of Contents
Funding Sources
In the Funding Sources interface, you can create funding sources, allocate credit to funding sources, and apply credit to funds. Funding sources allow you to specify the sources that contribute monies to your fund(s), such as your municipal government, grants, and donations. You can create as few or as many funding sources as you need.
Funding sources are not tied to fiscal or calendar years, so you can continue to apply credits to the same funding source over multiple years, e.g. City of Fiction. Alternatively, you can name funding sources by year, e.g. City of Fiction 2011 and City of Fiction 2012, and apply credits each year to the matching source.
Create a funding source
Funding sources should be created for each source your library receives collection funding from.
1. Select Administration→Acquisitions Administration→Fund Administration.
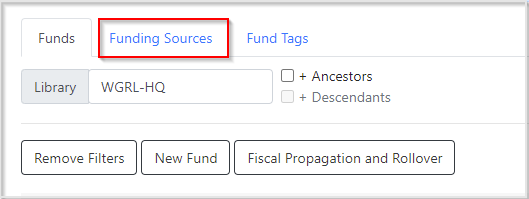
2. This is a unified page for funds, funding sources, and funds. To access funding sources, click the second tab for Funding Sources.
3. Click New Funding Source.

4. This will open the editor to create a new funding source. The required fields are:
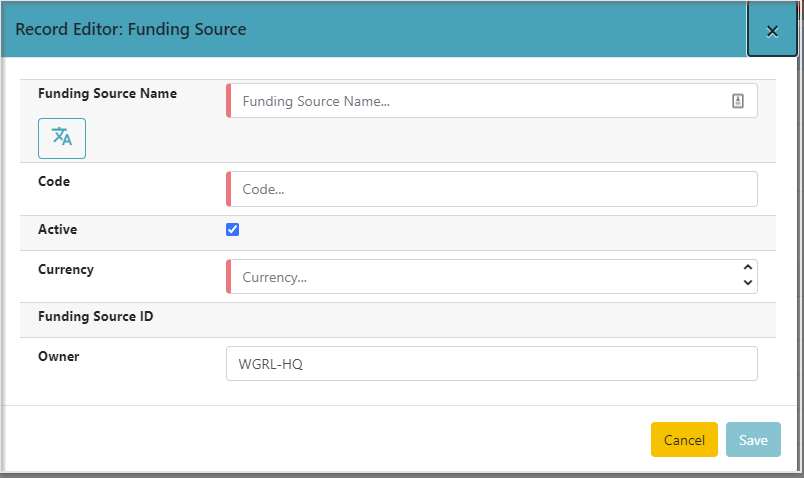
- Name - There is no limit to the number of characters that can be entered in this field.
- Code - This is what the funding source will be identified by throughout Acquisitions, so it should be meaningful.
- Active - Should be checked
- Currency - The currency that the money is in. For most PINES libraries, this will be US Dollars
- Owner - This field defaults to filling in your workstation library. Make sure to change it to your ordering agency.
5. Click Save.
Edit a Funding Source
Editable fields are:
- funding source name,
- owner,
- code, and
- currency
1. Select Admin→Acquisitions Administration→Funding Sources.
2. Double-click in the row, not on the linked name, you would like to edit. A pop-up box will appear in which you can edit fields.

3. Make your changes and click Save.
Delete a funding source
A funding source can only be deleted if no credit has been applied to it. Ensure you apply the correct amount of credit to each funding source as there is no way in the staff client to edit the amount applied.
Delete a funding source by checking the box of the funding source you wish to delete and clicking Delete Selected. There will be no confirmation message/action.
Apply credits to a funding source
1. Select Admin→Acquisitions Administration→Funding Sources.
2. Click on the hyperlinked name of the funding source you would like to apply credit to. This takes you to the Funding Source Details screen.

3. Click Apply Credit.

4. Enter the amount to apply to this funding source.
5. Enter a note (optional).
6. Click Apply.
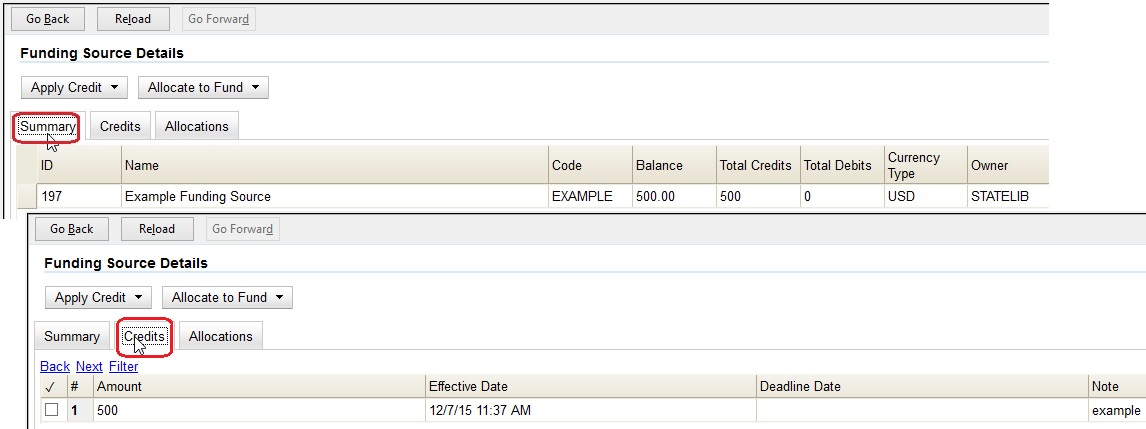
7. The Summary tab will update to reflect the credit applied. The Credits tab will display all credits that have been applied to the funding source. You may need to click Reload to view the tabs.
Allocate Credit to Funds
Once you have set up your funds, credit can be allocated to them from your funding sources in two ways: the funding source interface and the fund interface.
To allocate credit using the funding source interface:
1. Select Admin→Acquisitions Administration→Funding Sources.
2. Click the hyperlinked name of the funding source.

3. Click Allocate to Fund.
4. From the Fund drop down menu, select the fund you would like to allocate credit to.

5. Enter the amount you would like to allocate.
6. Enter a note (optional).
7. Click Apply.
8. The Allocations tab will display all allocations made to funds out of this funding source. See track debits and credits for more information.

Track debits and credits
You can track credits to and allocations from for each funding source through the Summary tab on the Funding Source Details screen.

The Credits tab tracks all credits applied to the funding source. After applying credit you will need to click Reload to view the Credits tab.

The Allocations tab tracks all allocations from the funding source to funds. After allocating to a fund, you will need to click Reload to view the Allocations tab.
