Table of Contents
Item buckets
Item buckets are virtual containers that hold items for batch processing and other functions. With copy buckets, catalogers can transfer multiple copies to the same volume, edit item attributes in batch, delete items in batch, and print spine labels. Items remain in the bucket until they are removed.
The Item Bucket interface is accessed from the Cataloging menu - Item Buckets
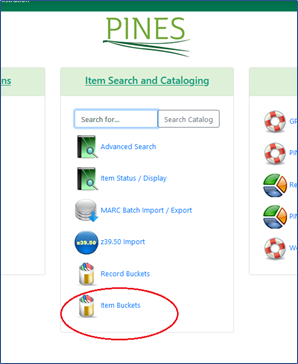
Or from the PINES splash page:
Permissions for Item Bucket management and use.
Permissions to manage and use buckets are not set by default for all staff logins. Your local system administrator may need to add permissions to staff in order for them to add items to a bucket, for example. The permissions for buckets are:
CONTAINER_BATCH_UPDATE
CREATE_CONTAINER
CREATE_CONTAINER_ITEM
DELETE_CONTAINER
DELETE_CONTAINER_ITEM
UPDATE_CONTAINER
VIEW_CONTAINER
Navigating Item Buckets
Customizing the list
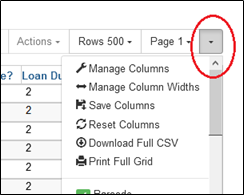
You can customize the bucket list as you can other lists in Evergreen. Select the dropdown menu on the right, select and position the columns as you need. Remember to Save Columns after you are done so that the custom configuration is available the next time you open the item bucket interface. You can add and remove columns as needed for a specific task. For more information, see Column Configuration
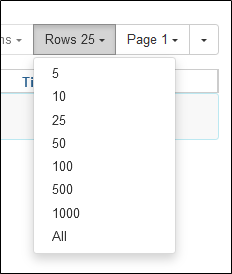
Select number of rows to display
You can display from five to all rows in a bucket. Be aware that displaying all rows for a bucket containing a large number of items can take significant time to load and navigate. You can change the number of rows displayed as needed for a specific task.
Navigating between pages
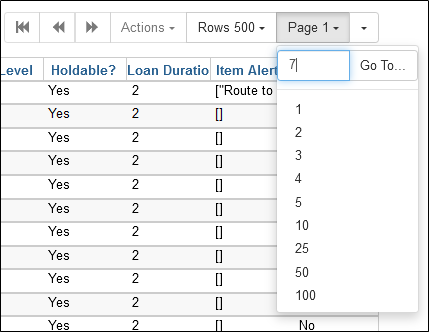
Forward and back buttons navigate between pages. The start button takes you back to the first page. Displaying 500 or more items to a page can significantly slow navigation from page to page.
You can also go to a specific page by using the drop down menu at the page number and either using one of the preset numbers or typing in the desired page number.
Sorting a list
You can sort the list by each column heading, A-Z and then Z-A. This sorts the entire bucket, even if you have more items in the bucket than are displayed per page.
Opening a bibliographic record
Click on the linked title to view the bibliographic record. Right click to access the menu to open in a new tab or page.
Displaying items in Item Status
Click on the linked barcode or right click to access the menu to open it in a new tab or page. The item will open in the display view of Item Status.
You can open multiple items in list view. Choose your items and pick Show – Open in Item Status
Item status will open in a new tab in list view.
Creating Item Buckets
Item buckets can be created in the interface or on the fly when adding copies to a bucket form Holdings view or Item status.
In the item bucket interface
Click on the drop down menu Buckets and choose New Bucket.
A dialog box will open.
Name your bucket and optionally add a description. You cannot reuse names; however, the bucket interface is case sensitive.
Creating a bucket in Holdings view and Item status.
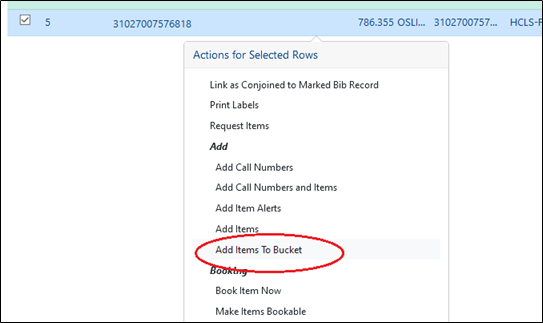
In holdings view or item status, select the item(s) to be added to the new bucket and, from the Actions menu, choose Add Items to Bucket.
Select the tab New Bucket
Enter a name for the bucket, and click Add To New Bucket
Editing Item Buckets
You can change the name, description, or publically visible flag in Edit Buckets. Open a bucket and from the dropdown menu choose Edit Buckets. A dialog box will open where you can edit the name, add or edit the description, or check/uncheck the shareable flag.
Make the desired edits and then click on Apply Changes.
Sharing Item Buckets
Any bucket can be shared using the bucket ID number. You can find the number either in the URL while the bucket is open or in the bucket header:
Using the number, staff with the appropriate permissions can open the bucket from Buckets – Shared bucket.
After entering the ID number into the dialog box, click Load Bucket.
Deleting Item Buckets
With the bucket displayed, it can be deleted from Bucket – Delete Bucket. A click through dialog box opens to confirm or cancel the deletion.
Buckets do not have to be empty to be deleted. Items in the bucket are not deleted when the bucket deletes.
Adding Items to a Bucket
Items can be added to an item bucket from pending items in the bucket interface, holdings view, or item status. Items can also be added to buckets from Check in and other places in the circulation menu.
From the Item Bucket Interface
In the interface click on the Pending Items tab.
- Scan in all of the items you wish to add to the bucket.
- Click on the Buckets dropdown menu and select the bucket for the items, or create a new bucket if needed.
- Use the check boxes to select the item(s) you wish to add to the bucket. You can add all or a subset of the list.
- Click Actions and select Add to Bucket. The selected items will be added to the bucket. The number of items in the bucket, displayed beside the bucket name, will update as will the number on the Bucket View tab.
- Once you have added your selected items to a bucket you can deselect them, select other items on your pending list, and add those items to a different bucket.
The pending list can be cleared from the Actions menu. You must check a least one item. However, ALL items on the list will be cleared. You can also clear the pending list by redisplaying or closing the bucket tab.
From Holdings View
Retrieve the title through a catalog search. In the Holdings View tab, use the check boxes to select the item(s) you would like to add to the bucket. Then click Actions – Add Items to Bucket
Enter a name for your bucket or select an existing from the drop-down menu. Click Add To New Bucket or Add To Selected Bucket.
You can add items from multiple bibliographic records to the same bucket.
From the Scan Item/Item status Interface
Enter items in item status by either scanning them in, pasting a comma separated list of barcodes in the input well, or loading a file. Select those you want to add to the bucket. Click on Actions – Add items to bucket. You can add items from item status to different item buckets, if needed.
You can add items to different buckets from the item interface by selecting those to go in one bucket, adding them, deselecting them and then selecting the next set to be added to the next bucket.
You can add items from multiple item status imports to the same bucket.
Selecting items in a bucket
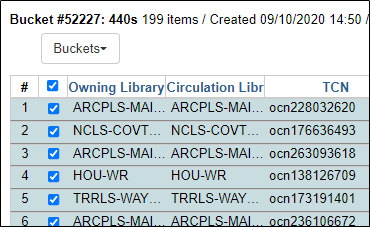
You can select all the items on a page by clicking in the box at the beginning of the list
Deselect the list by unchecking the box.
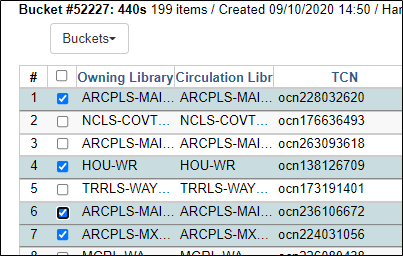
Select individual items by checking the box by each item
Select a range of items by checking the first item in the range and, holding the shift key, click on the last item anywhere other than the check box.
Use caution because clicking again anywhere will deselect the section. You can ignore the highlighting.
Removing Items from a Bucket
Select the item or items you wish to remove from the bucket. From the Actions menu, click on Buckets – Remove Selected Items from Bucket
The item(s) will be removed without a dialog box to cancel the action.
Moving Items from one bucket to another
You can move items from one bucket to another using the pending items interface.
From a bucket, select the item or items you want to move.
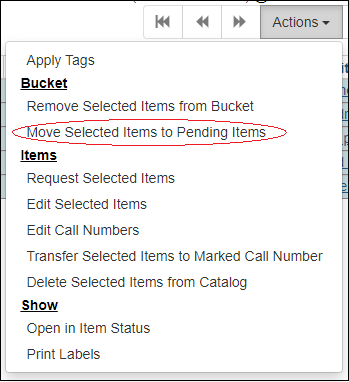
From the Actions menu, select Bucket – Move Selected Items to Pending Items.
The item will be removed from the bucket and placed into Pending Items.
Open your target bucket in bucket view, then click on the Pending Items tab and select the item or items to be moved. From the Actions, select Add to Bucket.
The item will be moved to the target bucket. You can clear the pending list either from the Actions menu or closing the item bucket interface.
Editing Items in a Bucket
In your bucket, select the item(s) to be edited. From the Actions menu, click on Items – Edit Selected items or Items – Edit Call numbers.
The Holdings editor will open. Make necessary changes to the item attributes or call number. Click on Save & Exit. The items will be updated,; you may need to redisplay the item bucket to see the changes in displayed columns. See The Holdings Editor for more information on editing in the holdings editor.
Best practice is to display 100 items, and select the entire list, edit and then navigate to the next page.
Deleting Items from the Catalog
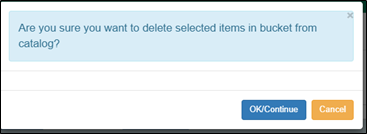
Select the item(s) to be deleted. From the Actions menu, click on Items—Delete selected items from Catalog. A confirmation pop-up box will open:
Click OK/Continue to delete the items or Cancel to stop the action.
Placing Holds on Items in a Bucket
You can place a copy level hold on items in a bucket. Select the ones you need and from the Actions menu, choose Items – Request selected items. A pop-up dialog will open with your card number and name. You can change the pickup library here. It also displays the number of items to be placed on hold.
Copy level holds will be placed on the items.
Transferring Items to Volumes
If you have multiple items across multiple titles that need to be transferred to a single volume, you can use an item bucket, rather than having to transfer multiple times.
Identify the bibliographic record containing the correct volume. In holdings view, select the volume and, from the Actions menu, choose Mark – Mark Library/Call number as Transfer Destination
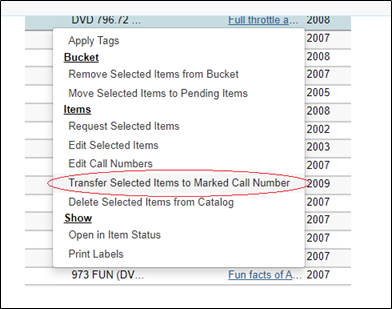
In the item bucket, select the items to be transferred to the marked volume and choose Items – Transfer Selected Items to Marked Call Number. The transfer will occur with no confirmation request.
See Transferring volumes and items for more information.
Printing Spine/Pocket Labels
You can also print spine/pocket labels from item buckets.
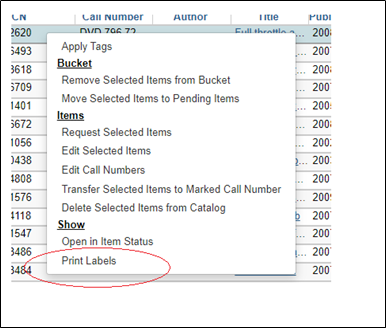
Select the items for labels From the Actions menu, click on Show – Print labels.
Follow instructions at Spine Label Printing to print labels.


